Monday, May 9, 2016

Quid ad cenam paro : Trinidad Chicken Curry


What am I preparing for dinner?
A lovely new recipe for Trinidad Chicken Curry adapted from The Pioneer Woman.

In the beginning


I came upon this recipe because I was looking for things that one does with turmeric. Turmeric has many health benefits and is great from a food-as-healer perspective. It has long been known as an anti-inflammatory and is useful in helping to relieve a number of chronic conditions. And it doesn't turn your teeth yellow, which is always good.

There are many possibilities. You can sprinkle and cook it with all manner of dishes: smoothies, steaks, chicken, rice, pasta, eggs, potatoes, et al. I learned that it is one of the ingredients in mustard. Besides mustard seed, of course. But Hot Dog with Mustard wasn't doing it for me. So I came upon a recipe for Trinidad Chicken Curry, and it looked like just the type of thing to start from.

The Recipe

Trinidad Chicken Curry
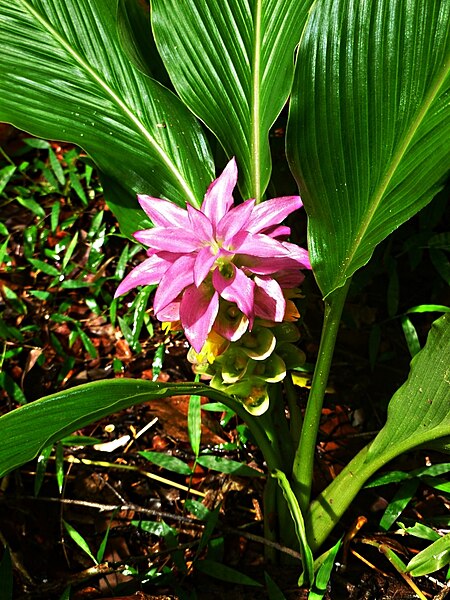
File:Native Turmeric Cooktown.jpg
"Native Turmeric Cooktown.jpg"
By John Hill (Own work)
via Wikimedia Commons

Ingredients

4 boneless, skinless chicken breasts, cut to 1-inch pieces
2 teaspoons salt
Freshly ground black pepper
1 teaspoon yellow mustard
1 whole onion
1 green pepper
2 Roma tomatoes
4 teaspoons (8 cloves) minced garlic
1 handful cilantro
1 Tablespoon lime juice (or key lime juice)
1/2 to 1jalapeño, chopped (optional)
2 Tablespoons (well-rounded) curry powder
2 Tablespoons turmeric
4 Tablespoons peanut oil
2 teaspoons coriander

Instructions

  1. Start the rice. Nice sticky rice is best, so if you start it first in a rice cooker or nice and low on the stove, it has all the time it needs.
  2. Place chicken in a bowl. Sprinkle with salt and add mustard.
  3. Chop and then add half the onion, tomatoes, cilantro, garlic, green pepper, and black pepper (plus jalapeño). Add the lime juice.
  4. Stir the whole mixture together so that the chicken is totally coated in the seasoning ingredients. Allow chicken to marinate while you prepare the rest, or this part can be prepared in advance.
  5. Add curry powder and turmeric to a bowl. Pour in 3/4 cup water and stir until dissolved. 
  6. In a large skillet, heat the vegetable oil over medium-low heat. Toss in the coriander and seeds and allow to sizzle momentarily. Pour in the curry mix cook for a few minutes, stirring constantly. The color will darken. Add a little more water if needed.
  7. When the curry has become a thick paste, add the other half of the chopped onion. Then add in the chicken. Stir to coat the chicken, then cook, half covered, for five minutes.
  8. Add in 1 to 2 cups of water. Stirring occasionally, cook for another 20 minutes.
  9. If you like a more structured sauce, add the corn starch at the 15-minute mark by scooping out a tiny bit of sauce and mixing it with the cornstarch until smooth, then add that mixture back into the whole.
  10. Add salt and pepper and fresh cilantro to taste.
  11. At the end, be sure to taste and adjust salt and pepper. Serve with chopsticks (because fun!) over sticky rice; spoon sauce over the top. If you want more vegetables, steam some in your rice cooker and serve on the side. I recommend asparagus. It tastes great with the sauce!
  12. Bless us O Lord, and these thy gifts, which we are about to receive from thy bounty, through Christ, our Lord. AMEN!!

The Verdict

Who can go wrong with chicken curry? I didn't burn the curry paste, or the rice (thanks rice cooker!), so the dish came out great. Flavor-wise, this recipe is a keeper for me. This version has more vegetables per serving that most curries, and double that of the Pioneer Woman's version. If you are into fresh kale or spinach, this recipe would work well. Maybe I will try that with the leftovers. The intersection of the hint of lime and the sweetness of the coriander were an excellent backdrop for the spicy mixture of curry, turmeric, black pepper, and jalapeño. Bonus: the sweetness lingers on so the house smells great!

Friday, August 15, 2014

Attack of the Bubble Wands

This post is part of a series about ONE THING that we did in our homeschool this week that I loved.

See Listening Map, K. Edwards
Our Second Week of School is in the books! This week, my One Thing is the music appreciation activity we did on the Finale of the William Tell Overture, by Gioachino Rossetti.

Using the materials found at ClassicsForKids as a guide, first I told the story of the life of Rossini, then of Guillaume Tell. I had pictures of a flute and an English horn, and we did some eyes-closed imagining of pastoral countrysides in the mountains. Then I introduced the listening map.

Cue the music! We pretended to be the breeze, birds, and butterflies in the first section, dancing with abandon. At the call-to-arms of the trumpet fanfare, we grabbed our swords (bubble wands) and prepared to fight occupying soldiers. Needless to say, we were victorious, on the floor, and laughing when it was all over.

They asked to do it again. So we did.

And it is on the list of things to show Daddy this weekend!


Lesson: Music Appreciation
Age/Grade: K-2
Time: 20 Minutes
Materials: Guide from Classic for Kids has all the links and printables + tons of ideas.
http://www.classicsforkids.com/teachers/lessonplans/#rossini


Thursday, March 6, 2014

Lent Prayer Chain

[Draft: I will write more about our prayer chain and family Lenten observances, but for now, please make use of my prayer chain documents if you like. Blessings upon you this lent!]


I printed the activity charts on different construction paper, 9 x 12 trimmed to 8 1/2 x 12 so that it fit in my printer. Dark blue = Ash Wednesday and all Fridays, Purple = M-Th, Light Blue = Saturdays and Holy Week M-Th, White = Sundays, Gold = Easter. You need to laminate the top banner, and hole-punch at top and bottom.


I stapled the chains. You may glue if you wish.


Et voilá!

In the morning we read the one for the current day but leave it on. We do our night prayers around the chain and tear off that day's link.

Here is the doc. Use and share as you like!

Lent Prayer Chain

Pax!

Thursday, February 20, 2014

Cream Cheese Apple Crumble

What to do when you have a hankering for apples and cheese cake, but it needs to be something you can share? A recent MOPS meeting was the perfect opportunity to bake up this goodness. Enjoy!

Cream Cheese Apple Crumble

Lisa-Marie Duffield

Yield: 24 Apple Cheesecake Crumble Bars

Ingredients:

Crisp Crust and Topping:
  • 1 1/2 cups all-purpose flour
  • 1 1/2 cups regular oatmeal
  • 3/4 cup brown sugar
  • 1/2 teaspoon salt
  • 1/2 teaspoon cinnamon
  • 1 cup chopped nuts
  • 6 ounces butter, melted
Cheesecake Layer:
  • 1 (8-ounce) package softened cream cheese
  • 1 cup sour cream
  • 1/2 cup sugar
  • 2 tablespoons all-purpose flour
  • 1 teaspoon vanilla
  • 1 large egg
Apple Topping:
·         3/4 cup light brown sugar
·         1/4 cup all-purpose flour
·         1 teaspoon ground cinnamon, plus more for sprinkling
·         6 medium apples, peeled, cored and thinly sliced
·         1 lemon, zested and juiced, or equivalent lemon juice


Preparation:

  1. Heat oven to 350 degrees. Lightly grease a 13x9-inch glass pan.
  2. In a medium bowl, mix together flour, oats, brown sugar, salt, cinnamon and nuts. Stir in butter until finely crumbled. Pat 3 cups of mixture into the bottom of the prepared baking pan, pressing to make an even layer. (Reserve at least 1 cup for topping.) Bake for 10 minutes. Remove from oven and cool completely. 
  3. Meanwhile, make the cheesecake filling by beating together cream cheese, 1/2 cup sugar, 2 tablespoons flour, vanilla and egg until smooth. Spread cream cheese mixture evenly over partially baked and cooled crust. 
  4. Sprinkle apples with the juice of 1 lemon and stir. Gently spread the other ingredients over the apples. Stir evenly to coat the apples. Spread apple topping evenly over cream cheese mixture and sprinkle with reserved crust mixture.
  5. Bake 40 to 50 minutes or until apple filling is bubbly and topping is golden. Let cool in the pan on a wire rack for 30 minutes. Refrigerate at least 2 hours before cutting into 24 bars and serving.

Thursday, August 22, 2013

French Club Curriculum


The following are the primary materials that we are using for our French Club learning this year:

1. L'Art de dire

L'Art de dire is available from nallenart.com
"For pre-readers and/or beginners in grades Kindergarten-3. A great introduction to learning French. Detailed lesson plans, reproducible teaching aids and a totally oral approach make this program ideal for teaching French to children who are not yet ready to learn to read in French."

I chose this curriculum for our family with French club in mind because it seems like it will be a good way for families to learn together at a gentle pace without any traditional study. It is easy to supplement with games, songs and daily repetition.


2. Play and Learn French

Play and Learn French is available at Amazon.com

We use this for some extra vocabulary in between L'Art de dire lessons. It is good for introducing parents to phrases and games that they can use to help create a French environment for immersion-style learning at home. I think it makes a good supplement to other learning materials or for those parents who already speak at least intermediate-level French. It would not function well as a stand-alone learning tool.


3. Yadeeda/Alan Le Lait

The French Songs of Alan Le Lait are available through Amazon.com

His main website is http://www.yadeeda.com/

The songs can also be watched on YouTube!

4. YouTube

The world of language learning is at your fingertips in YouTube, and below I have linked to my playlists for French Club.

But Be Warned!

There are ads on YouTube before many of the videos, and it is not advisable to leave your children watching a playlist unless you are handy to skip the ads as they begin to play. Even on children's content, the ads are not always appropriate for younger viewers.

Français en famille
This playlist is added to each week with a few videos to help reinforce what we did at French club. Listen often, even in the background.

Français: chansons enfants
French songs, nursery rhymes, ear worms. Great for listening to at breakfast or while mom and dad get dinner ready!

Français: dessins animés
When you are feeling brave, offer cartoons - in French!


Bienvenue au club Français!

This week begins another brand new adventure: French Club. Check out the tab at the top of the blog for posts relating to French club and keep up with our weekly progress!

Friday, November 23, 2012

Choo-Choo Cheese Snack Crakers


These Snacks are a delicious treat for train-loving kids and adults, but of course other shapes will do just as well. These are a good substitute for store-bought cheese crackers. The texture of store-bought ones are nearly impossible to replicate at home, but these are just as tasty. Enjoy!


Choo Choo Cheese Snack Crackers

1 cup All-Purpose flour
1 cup Quick Oats
1 1/2 tsp salt
1/2 cup (1 stick) cold butter
8 oz grated cheese (mozzarella, cheddar, Monterey jack or any combo)
1/2 cup cold water
Train cookie cutter, or similar (optional)

Tips: Have the oven pre-heated and all supplies ready to go before you pull the butter out of the refrigerator. If you work quickly you can then go from 0 to Crackers in 15 minutes.
 
1.      First pre-heat the oven to 350°. In the bowl of your mixer, stir salt into flour and oats.
2.      Cut the butter into 8-10 chunks and mix with flour and oats on medium speed until blended and crumbly. Then add grated cheese a handful at a time.
3.      While mixing, add water 1 tablespoon at a time until the dough can form a ball. You want the dough as dry as possible without being flaky.
4.      Form into a ball and flatten out with your hands. Flour well and roll out to 1/8 inch. Flour both sides when finished.
5.      Cut the crackers into shapes. I use a train but any cookie cutters do fine. Pull out shapes and place on the first tray and get it in the oven. Then cut the remaining into random shapes by criss-crossing with a knife or pizza cutter. Do not re-roll. If you just want squares or rectangles you can skip the cutter all together, even cutting right on the tray.
6.      Place on un-greased cookie sheets (about three) and bake one at a time, putting the other trays in the refrigerator to wait.
Bake at 350° for 9-12 minutes, until golden brown. Remove from trays immediately. Store in an air-tight container, unless all are consumed immediately!